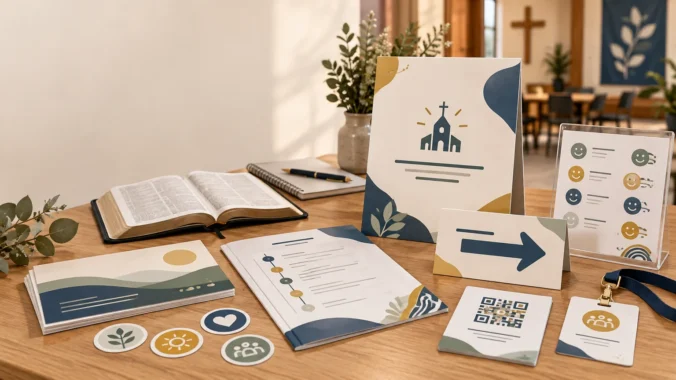
TLDR: A useful church event print kit guides people from arrival through departure. Start with a welcome sign, directional and room signs, name labels, a concise schedule, children’s check-in or pickup materials when applicable, QR resource cards or stickers, and a take-home piece. Build every item from one approved event-information sheet, test the complete guest route, and print only what serves a real decision or interaction.
The best church event print kit is not the one with the most pieces. It is the one that quietly answers the questions people ask throughout an event: Am I in the right place? Where do my children go? What happens next? How do I get the resources afterward?
That makes event printing an act of practical hospitality. Romans 12:13 calls Christians to practice hospitality, while 1 Corinthians 14:40 commends order in the gathered church. Neither passage provides a printing checklist, of course, but both help explain why clear communication matters. Thoughtful signs and handouts remove avoidable confusion so that guests and volunteers can give their attention to people, worship, teaching, and service.
Build the kit around the guest’s journey
Begin with the route an attendee will take rather than a catalog of products. Imagine a first-time guest moving from the parking area to the entrance, check-in table, meeting room, refreshments, children’s area, main session, and exit. At each stage, ask what the person needs to know and whether a printed item is the clearest way to communicate it.
| Guest stage | Likely question | Useful printed piece |
|---|---|---|
| Before arrival | When and where is the event? | Invitation, reminder card, or mailed announcement |
| Parking and entrance | Which door should I use? | Entrance sign and simple directional signs |
| Welcome or check-in | What do I do first? | Welcome sign, check-in instructions, and name label |
| Room finding | Where is my group or session? | Directional arrows and temporary room labels |
| Children’s ministry | Where do children go, and how does pickup work? | Check-in directions and policy-aligned pickup identifiers |
| During the event | What happens next? | One-page schedule, session card, or program |
| Resource access | Where can I find the lesson or follow-up material? | QR resource card or sticker with a written alternative |
| Departure | What should I remember or do next? | Take-home card, response form, or next-event reminder |
This method prevents a common mistake: producing attractive items that do not solve an attendee’s problem. A banner with an event theme may create atmosphere, but it should not replace a sign that tells a new family which entrance to use.
Create one source of truth before designing anything
Before opening a design program, prepare a master event-information sheet. Have one event leader approve it. Every sign, label, schedule, invitation, QR destination, volunteer sheet, and take-home card should draw from this document.
- Official event name and short name
- Date, starting time, ending time, and check-in opening time
- Street address, entrance name, and relevant parking instructions
- Approved room names exactly as they will appear in the building
- Age or registration information, if applicable
- Children’s check-in and pickup instructions approved by ministry leadership
- Event schedule and speaker or leader names
- Primary contact information
- Approved web address and QR-code destination
- A clear description of what attendees should do next
This simple step prevents competing versions of the date, room name, link, and schedule. If a detail changes, update the master sheet first and identify every printed item affected by the revision.
The essential church event print kit
Welcome and wayfinding materials
A welcome sign should confirm the event name and tell guests what to do next. “Welcome to Family Bible Study Night—Check in at this table” is more useful than “Welcome” by itself. Near the entrance, use directional signs only at actual decision points: intersecting hallways, elevators, stairways, check-in areas, and doors that could reasonably confuse a guest.
Keep temporary room labels consistent with the names used in registration messages and schedules. Use large type, strong contrast, plain wording, and a low-glare surface where practical. Do not cover or contradict a building’s permanent room-identification signs.
The ADA standards distinguish permanent room-identification signs from temporary signs and include an exception for signs used for seven days or less. Temporary paper signs, however, do not replace permanent accessible identification where it is required. Churches planning facilities or permanent signage should consult the official ADA Standards for Accessible Design and obtain appropriate professional guidance rather than treating event posters as a compliance solution.
Name labels and volunteer identification
For many events, a name label needs only a preferred first name. A last initial, group color, table number, or role can be added when it helps the event function. Avoid displaying phone numbers, addresses, medical details, or unnecessary information.
Make volunteer roles recognizable without creating a complicated badge system. “Welcome Team,” “Children’s Check-In,” “Prayer Team,” and “Event Leader” are easier for guests to understand than internal ministry abbreviations. Color can support the wording, but it should not be the only way roles are distinguished.
Children’s check-in and pickup materials
Children’s pickup identifiers should support the church’s existing written procedure. Their purpose is to help authorized volunteers match a child with the appropriate parent or caregiver while limiting unnecessary personal information. The exact format may vary by church policy, insurer, denomination, program, and local requirements.
Do not invent the pickup procedure at the design stage. Ask the children’s ministry leader what volunteers must verify, what happens when an identifier is lost, how allergies or care notes are communicated privately, and who may override the normal process. Printed labels should reinforce those decisions, not become a substitute for them.
Labels and stickers can also organize classroom supply bins, age-group packets, volunteer folders, and take-home bags. If the church needs several coordinated designs or a larger quantity, this guide to ordering bulk stickers for a church congregation can help the team prepare the order.
Schedules and participation materials
Most attendees need a simple sequence rather than a minute-by-minute production plan. A public schedule might list welcome, meal, opening session, age-group activities, discussion, and dismissal. Keep backstage cues, technical notes, and volunteer assignments on a separate team sheet.
For a Bible-study event, participation materials may include the Scripture passage, discussion prompts, note space, a reading plan, or a family conversation card. Check quoted passages carefully against the named Bible translation. If copyright or reproduction limits apply to the selected translation or study resource, verify permission before printing in quantity.
QR resource stickers and cards
A QR code is useful when it moves attendees from a physical setting to a specific digital resource: registration, a lesson PDF, an event calendar, a reading plan, or an audio recording. Label the action in ordinary language, such as “Scan for the five-day reading plan.” Do not print an unexplained square and expect guests to trust it.
Include a short written URL or a contact-based alternative for people who cannot or prefer not to scan. Send users to a trusted destination controlled or approved by the church, and check the final destination before distribution. NIST mobile-device guidance notes that QR codes can direct users to URLs, making the destination—not merely the visible code—important to evaluate.
Test a physical proof at its finished size using several phones and under lighting similar to the venue. CustomStickers advises a practical target of at least a one-inch-square QR code and recommends testing before a larger order, although that is vendor guidance rather than a universal technical standard. QR stickers are most useful on durable take-home cards, resource folders, supply containers, and signs intended for repeated use—not on every available surface.
Invitations and take-home materials
Printed invitations make the most sense when the church wants a personal handoff or mailed reminder for a special gathering, such as a banquet, anniversary, women’s retreat, Christmas program, or community meal. When coordinated stationery is genuinely part of the task, a team can compare options for custom invitations, announcements, and matching cards.
A take-home piece should give attendees one manageable next step. That could be the next meeting date, a short reading plan, family discussion questions, contact information, or a reminder to complete registration. Avoid shrinking an entire event program onto a small card merely because space is available.
A worked example: family Bible-study kickoff
Suppose a church is holding a Wednesday evening kickoff for families. The approved information sheet identifies the family entrance, check-in time, meeting rooms, children’s pickup procedure, session schedule, and a five-day reading plan.
From that one sheet, the team creates an entrance sign that says where to check in, two hallway arrows, consistent room labels, first-name labels for adults, policy-aligned child and caregiver identifiers, and a one-page schedule. A small take-home card names the next meeting date and links to the reading plan through both a tested QR code and a short URL.
The team does not print decorative signs for every wall. It walks the route, identifies four genuine decision points, and places signs there. Materials are packed by station—entrance, check-in, children’s area, meeting rooms, and departure—rather than placed in one large box for volunteers to sort ten minutes before opening.
A practical production timeline
- Three to four weeks before: Approve the master information sheet, map the guest route, decide which pieces are necessary, and order any invitations or custom-printed materials that require additional production time.
- Two weeks before: Draft every item, confirm room names and children’s procedures, create the QR destination, and ask both an event leader and an unfamiliar reader to review the wording.
- One week before: Print or obtain a complete proof set. Test QR codes, verify Scripture references, check names and dates, and walk the building with the actual signs in hand.
- Two or three days before: Print final quantities, prepare a small replacement set, and pack materials by station with mounting supplies and brief placement notes.
- Event day: Install signs early enough to walk the route from the parking area as though arriving for the first time. Confirm that doors, furniture, or crowds do not hide essential directions.
- After the event: Remove temporary signs, record what ran out or went unused, and save corrected source files and notes for the next event. Avoid automatically reusing labels containing personal information.
Final proofing checklist
- Event name, date, times, address, entrance, and room names agree everywhere.
- Arrows point the correct way from the attendee’s viewing position.
- Type is readable at the intended distance, with clear contrast and minimal glare.
- Name labels reveal only information needed for the event.
- Children’s labels and pickup instructions match the church’s approved procedure.
- The public schedule contains attendee information rather than backstage details.
- Every QR code works from a printed proof and opens the intended trusted destination.
- A written URL or contact alternative appears where digital access matters.
- Scripture references, quoted wording, names, and contact details have been checked.
- Materials are packed by station and assigned to a responsible volunteer.
Start with one event and one clear route
For the next event on your calendar, resist the urge to begin with templates. First create the master information sheet. Then walk the attendee’s route and mark every point where a guest, parent, child, or volunteer must make a decision.
Build the church event print kit around those moments. If a sign, label, schedule, sticker, or card helps someone know where to go, what to do, or how to continue afterward, it has a clear job. If it does not, leave it out. A smaller coordinated kit will usually serve the church better than a large collection of disconnected print pieces.